This chapter contains the following topics:
Introduction to Completion Estimates
Printing an Inspection Worksheet
Use this selection to enter all of your current completion estimates for active jobs. To get valid projections of future profit on jobs, or to see how you are currently doing on a job compared to your budgets, you need up-to-date estimates of what it will take to complete the job.
These completion estimates apply to the separate cost items that make up the job.
You can use this selection whether you use the percentage-of-completion method of contract accounting or the completed-job method.
You can enter completion estimates in one of three ways:
| • | as the current percentage complete |
| • | as the estimated cost to completion |
| • | as the estimated hours or units to completion. |
You are not required to be consistent in your use of these. Some cost items of a job can be estimated by one method and some by another. Also, you can use one method today and a different method tomorrow.
You can also enter an overall completion percentage for the entire job. This percentage (and calculations based on this percentage) will appear on the Job Status Report. Refer to the Job Status Report chapter for a full explanation of the report information obtained by the posting of completion estimates.
Your completion estimates can be entered at the job level or the cost item level, or both. If you enter both, the system does not enforce any logical relationship between the two—for example, you can state that every cost item in the job is 10% complete but that the job as a whole is 70% complete.
| • | Use Enter to enter a completion estimate for either an individual cost item or the job as a whole. |
| • | Use Fast enter to enter a single percentage estimate for the job and for all its cost items. |
| • | You cannot enter a completion estimate for an individual sub-job, nor for a change order. |
It is not required that you provide completion estimates for every cost item of a job before posting those estimates. When posting occurs:
| • | For those cost items for which you have provided completion estimates, your new entries replace any previous entries. |
| • | For those cost items for which you have not provided completion estimates, the previous completion estimates remain in effect. |
Normally completion estimates increase as the job progresses, but this is not a requirement. When you enter a new completion estimate, you are not informed of what the existing completion estimate is (if any), nor are you warned when your new estimate is less than the old.
You can also enter a figure for the current amount of your outstanding purchase orders for the cost item. The amount of the outstanding purchase orders will be shown on the Job Status Report.
This feature is available whether or not you use the Passport Business Solutions Purchase Order module. Typically this feature is used to account for your subcontractors’ outstanding purchase orders at period-end. These would not be on file in your P/O system even if you did use that module.
You can print an Inspection Worksheet, which lists your jobs and the cost items for them, and provides spaces for you to enter your completion estimates. You can enter your completion estimates, which you will later post.
Select
Enter from the Completion estimates menu.
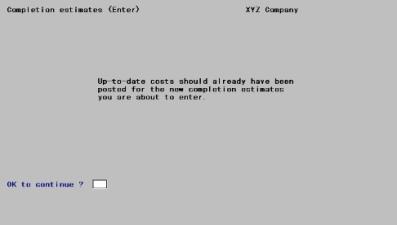
The following screen displays:
If up-to-date costs have been posted, answer Y. If not, answer N to return to the menu, and post the costs using Costing before returning to this selection.
You could answer Y and then enter and post completion estimates without up-to-date costs, but later Job Cost reports might give an incorrect picture of how you are doing on your jobs.
|
Format |
One letter, either Y or N. There is no default. |
|
Example |
Type Y |
The following screen displays:
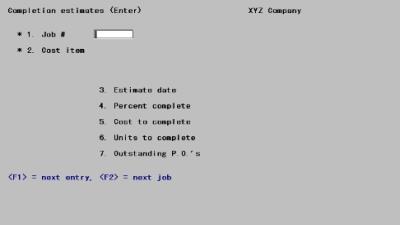
From this screen you can work with both new and existing completion estimates. If a completion estimate with the job and cost item you enter already exists, it will appear and be available for changes or deletion. The cursor will move to Field number to change ? for the purpose.
* 1. Job #
Options
Enter the job number for your completion estimate. The job must be active. You can also use one of the options:
|
<F1> |
For the next completion estimate entry (whether or not it is for the same job) |
|
<SF1> |
For the previous completion estimate |
|
<F2> |
For the next job in job number order, whether or not there is an existing entry for that job. Even if there is, the entry does not appear. |
|
<SF2> |
For the previous job |
The job name displays next to its number.
|
Format |
Up to 7 numbers. The default is the same job number as your last entry (if there was one). |
|
Example |
Type 602 |
* 2. Cost item
Options
Enter the cost item for the estimate. You can also use one of the options:
|
<F1> |
For the next cost item for this job |
|
<SF1> |
For the previous cost item for this job |
|
Blank |
To indicate you are entering a completion estimate for the entire job. If you use this option, Field #2 will display as * Estimate for entire job *, and Fields #5 through #7 will disappear from the screen at this point. |
|
Format |
9999999 (For the cost category #) 999 (For the sub-job #, if any; if not, this displays as zero automatically) 999 For the change order # if you use change orders; if not, this segment does not appear |
|
Example |
Type 1012 Press <Enter> again |
The type and unit of this cost item, if applicable, display to the right of the cost item.
3. Estimate date
Enter the date of the completion estimate.
|
Format |
MMDDYY The default is the date of the most recent entry in this session (or the system date, if this is the first completion estimate to have been entered in the current session). |
|
Example |
Type 102519 |
If you are entering the estimate for a cost item on a job, you can enter either:
| • | The current percentage complete |
| • | The estimated cost to completion. This is expressed in hours if the cost item is for labor, otherwise in dollars. |
| • | The estimated units to completion. This requires that the cost item: |
Not be for labor, and
Have some unit (for example, CUYD [cubic yards] or SQFT [square feet]). The unit, if specified, displays in the upper right corner of the screen.
If you are entering the estimate for the entire job, you will be able to enter only the current percentage complete.
4. Percent complete
If you have chosen to enter a completion estimate for the entire job, you must enter a percent complete here. After you enter this you will be positioned at Field number to change ?.
Otherwise:
| • | If you wish to use the percentage method, enter the current estimated percentage complete for this cost item. This figure is not the percentage left to complete, but the percentage already completed. After you enter this you will be positioned at Field #7. |
If you wish to use one of the other two methods, press <Enter> to proceed to Field #5.
|
Format |
999.999 |
|
Example |
Press <Enter> to skip. |
5. Cost to complete
If you wish to use the cost-to-completion method, enter the estimated cost it will take to complete this cost item. After you enter this you will be positioned at Field #7.
Otherwise, press <Enter> to proceed to Field #6.
|
Format |
999,999,999 |
|
Example |
Press <Enter> to skip. |
6. Units or hours to complete
If no unit is associated with the cost item, or no quantity has been budgeted for it, this field is skipped and cannot be entered.
If this is a labor cost item, enter the estimated hours needed to complete this cost item. Otherwise, enter the estimated number of units required for completion.
|
Format |
999,999,999 |
|
Example |
Type 40 |
7. Outstanding P.O’s
Options
Enter the total current amount of outstanding purchase orders for this cost item, or use the option:
|
<F1> |
To retain whatever amount is already on file |
|
Format |
999,999,999 |
|
Example |
Press <F1> |
Field number to change ?
Options
Make any needed changes, or use the option:
|
<F3> |
To delete this completion estimate. This option is available only for existing entries. |
Press <Enter> with this field blank for your entry to be processed. The cursor then moves to the first field for your next entry.
Before posting the completion estimates to the permanent Job Cost files/tables, print an edit list and review them for completeness and correctness.
You may view a Completion Estimates Edit List example in the Sample Reports appendix.
Select
Edit list from the Completion estimates menu or select Completion estimates edit list from the Reports menu.
After your selection, the Completion Estimates Edit List will print. No selection screen displays as all unposted entries are printed unconditionally.
When you are sure that all completion estimates have been entered correctly, you can post them to the permanent Job Cost files/tables. The Completion Estimates Register shows all completion estimates posted.
You may view a Completion Estimates Register example in the Sample Reports appendix.
Select
Post from the Completion estimates menu.
The Completion Estimates Register will then print.
A running display of the cost item currently being processed displays on the screen:
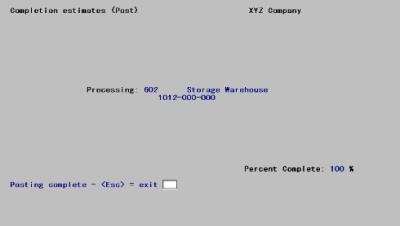
Some additional processing occurs even after the report has finished printing.
The Inspection Worksheet is not a required report, but some users find it useful. It lists your jobs with their cost items, providing space for you to enter your completion estimates. Once these are written on the Worksheet you can work from this to enter and post the estimates.
Existing completion estimates (posted or not) are intentionally not shown on this worksheet, so as not to bias the auditor.
You can print a worksheet for a single sub-job or change order even though you cannot enter a completion estimate for a sub-job or change order. You can still enter estimates for the individual cost items included within that sub-job or change order.
Select
Inspection worksheet from the Reports menu.
The following screen displays:
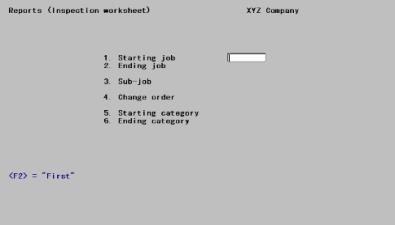
Enter the following information:
1. Starting job # and
2. Ending job #
Enter the range of jobs you wish to print worksheets for. Follow the screen instructions.
|
Format |
7 characters for each field |
|
Example |
Press <F2> at each field for First through Last. |
3. Sub-job #
If the starting job number is not the same as the ending job number, this field will automatically be set to All and cannot be entered.
If this job does not have sub-jobs, this field displays as Not applicable and cannot be entered.
Options
Otherwise, enter the desired sub-job number here. Alternatively, you can use the option:
|
<F5> |
For All sub-jobs |
|
Format |
999 |
|
Example |
[In this example the field is automatically set to All because you have entered a range of jobs.] |
4. Change order (CO)
If you have chosen (in Control information) not to use change orders, this field displays as Not applicable and cannot be entered.
If All was entered (or defaulted) for the sub-job number, the change order is automatically set to All and cannot be changed.
To print the change order by itself (without its parent job or sub-job), enter the change order number. If the change order extends over several sub-jobs and you want a worksheet for the change order only, then you must make a separate entry for each sub-job of the change order.
Options
To print the job or sub-job, with or without any of its change orders, use one of the options:
|
<F5> |
To print the job or sub-job with All its change orders |
|
Blank |
To print the job or sub-job without any of its change orders |
|
Format |
999 |
|
Example |
[In this example the field is automatically set to All because you have entered a range of jobs.] |
5. Starting category and
6. Ending category
Enter the range of categories you wish to print. Follow the screen instructions.
|
Format |
9999999 at each field For the first field, press <F2> for First For the second field, type 33102 |
Field number to change ?
Make any needed changes. Upon pressing <Enter> with this field blank, the Job Inspection Worksheet will print.
This function is used to generate completion estimate entries for all cost items of a job, as well as an entry for the job as a whole. It allows you to avoid entering a completion estimate for each cost item individually.
Each entry is assigned the same percent complete. If there are existing figures for outstanding purchase orders in Job Masters, then these figures are picked up and stored with each entry (as if you had used <F1> for the Outstanding P.O.’s field on the Enter screen).
While this selection is most useful if you have a lot of small jobs where the percent complete is the same for all cost items, it can also be used for larger jobs in that you can generate entries for all cost items here and then modify them per your Inspection worksheet prior to posting.
Fast enter can be used only on a job that does not already have completion estimates pending. If an unposted completion estimate exists for even one cost item of a job (whether as a result of the Enter selection or the Fast enter selection), then Fast enter cannot be used for that job until those estimates are either posted or deleted.
Select
Fast enter from the Completion estimates menu.
The following screen displays:
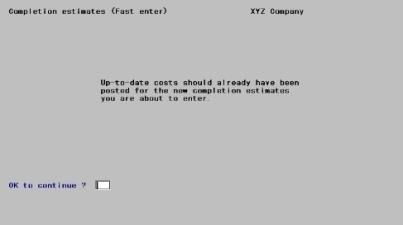
Answer N to return to the menu, or Y to continue.
If you answer Y, the following screen displays:
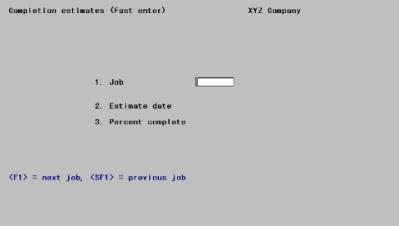
Enter the following information:
1. Job #
Enter the job for which you wish to generate completion estimates. The job must be an active job.
|
Format |
Up to 7 numbers |
|
Example |
Press <F1> |
2. Estimate date
Enter the date, which is to be assigned to each completion estimate entry.
|
Format |
MMDDYY The default is the current system date. |
|
Example |
Press <Enter> to accept the default. |
3. Percent complete
Enter the percent complete to be assigned to each cost item of the job, and to the job as a whole.
|
Format |
999.999 |
|
Example |
Type 50 |
Field number to change ?
Make any needed changes. Upon pressing <Enter> with this field blank, the following screen displays:
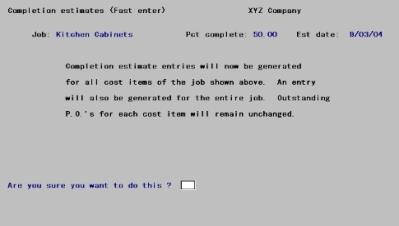
Answer N to cancel or Y to continue. If you answer Y, the completion estimates will be generated.
As this occurs, the following will display:
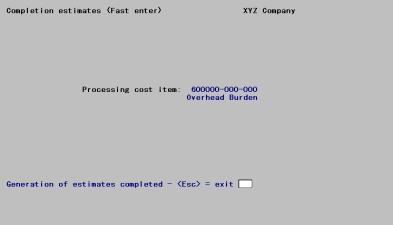
Upon completion, press <Esc> to return to the menu. You can then modify the estimates as needed (via Enter), print an edit list, and then post the entries.
This report shows the amount billed, cost, profit, profit percentage, estimated cost to completion, percent completed, revenue earned and billing information for each job.
Select
Percent of Completion from the Reports menu.
The first screen displays the following:
Up-to-date costs and completion estimates should already have been entered and posted to run this report.
OK to continue ?
Select Y to continue or N to exit back to the menu. If you select Y the following screen displays:
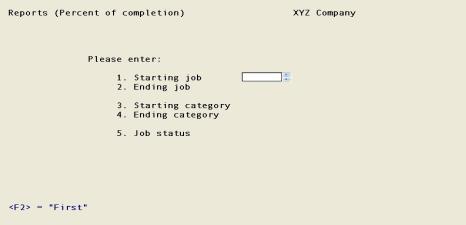
Enter the following information:
1. Starting job and
2. Ending job
Enter the range of jobs to show. Follow the screen instructions.
|
Format |
7 characters at each field |
|
Example |
Type 99 at the starting field Press <F2> for Last job at the ending field. |
3. Starting catagory and
4. Ending catagory
Enter the range of catagorys to show. Follow the screen instructions.
|
Format |
7 characters at each field |
|
Example |
Type 99 at the starting field Press <F2> for Last catagory at the ending field. |
5. Job status
Options
This lets you restrict the report to jobs with a particular status or combination of statuses:
|
A |
Active jobs |
|
C |
Closed jobs |
|
B |
To show both active and closed jobs |
|
Format |
One or two characters from the list above. |
|
Example |
Press <B> for both statuses. |
Field number to change ?
Make any needed changes. Upon pressing <Enter> from a blank field, the Percent of Completion report will be printed.